Grinch Sugar Cookies Vibrant Green & Red Heart Festive Fun
Grinch sugar cookies are more than just a holiday treat; they’re a portal to pure, unadulterated Christmas joy, with a mischievous, green twist! When the snow starts to fall and the carols begin to play, there’s something undeniably magical about transforming simple ingredients into these iconic, festive delights. Who doesn’t love the way a perfectly baked, vibrantly green Grinch sugar cookie can instantly brighten a gloomy day? It’s their cheerful color, their delightful sweetness, and the sheer fun of decorating them that makes these cookies a beloved tradition for families everywhere. They’re incredibly simple to whip up, making them perfect for little helpers eager to join in the holiday baking fun, and the slightly crisp edges with a soft, chewy center are utterly irresistible. Get ready to bake up some serious smiles because we’re diving into how to create the best Grinch sugar cookies you’ve ever tasted!
Grinch Sugar Cookies
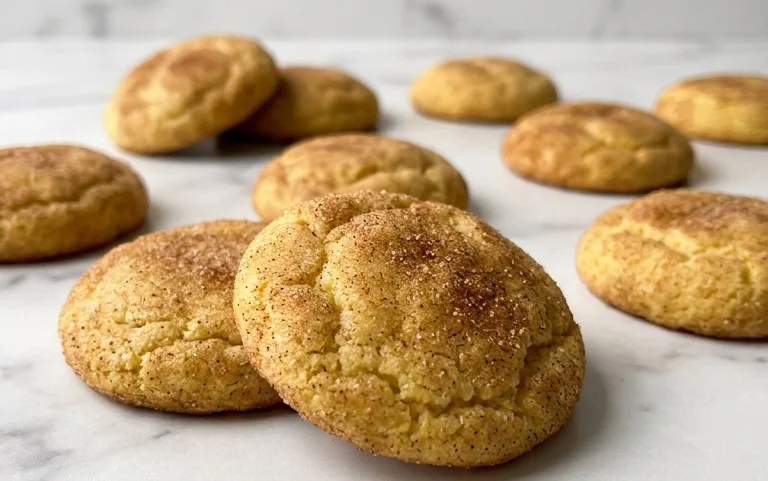
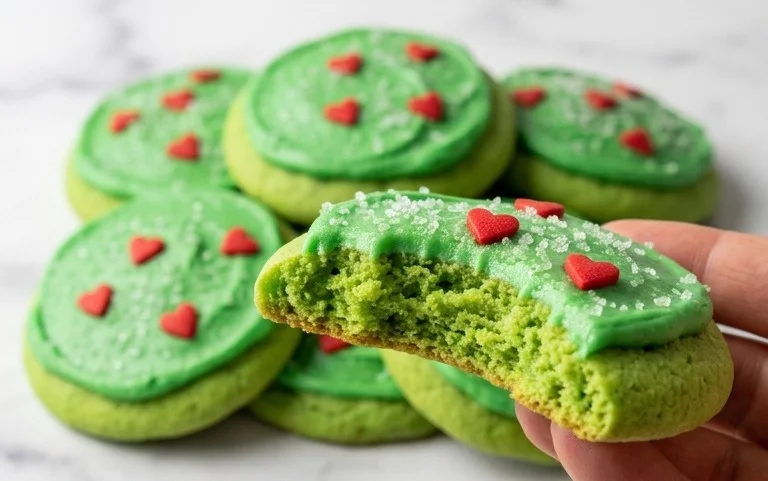
Get ready to spread some holiday cheer with these adorable and surprisingly simple Grinch Sugar Cookies! These aren’t your average sugar cookies; they’re infused with a vibrant Grinch-green hue and topped with a single, perfect red heart, just like the Grinch’s own. They’re perfect for a festive bake sale, a classroom party, or simply to brighten your own holiday season. The secret to their delightful texture and subtle sweetness lies in using just the egg yolks, which creates a wonderfully tender and slightly chewy cookie. Don’t worry about rolling out elaborate shapes; these cookies are all about their festive color and charming simplicity. Let’s dive in and get baking!
Ingredients:
- 1 stick (4 ounces/ 8 tablespoons) unsalted butter, softened
- 2/3 cup granulated sugar, plus extra for rolling
- 2 large egg yolks (no egg whites!)
- 1 teaspoon vanilla extract
- 3-5 drops green food gel coloring
- 1 1/4 cup all-purpose flour
- 1/2 teaspoon baking soda
- 1/4 teaspoon fine salt
- 12 red heart sprinkles
Getting Started: Prepping Your Dough
The first step to creating these Grinch-tastic treats is to get our dough base just right. In a large mixing bowl, cream together the softened unsalted butter and the granulated sugar. You want this mixture to be light and fluffy, like little clouds of sweetness. This process aerates the butter and sugar, which contributes to the cookie’s tender texture. I usually use an electric mixer for this, starting on low speed and gradually increasing to medium-high. Beat it for about 2-3 minutes until you see a noticeable change in color and consistency.
Next, we’ll add the richness and flavor. Carefully add the 2 large egg yolks to the creamed butter and sugar mixture. It’s crucial to only use the yolks for this recipe; the whites can sometimes lead to a crisper cookie, and we’re aiming for a delightfully soft and chewy one. Beat these in until they are fully incorporated. Now comes the fun part – adding that signature Grinch green! Add 3 to 5 drops of green food gel coloring. Gel coloring is preferred over liquid as it’s more concentrated and won’t alter the dough’s moisture content as much. Start with 3 drops and mix well. If you desire a more intense Grinch green, add an additional drop or two until you achieve the perfect shade. Don’t forget to add the vanilla extract at this stage for that classic sweet aroma and taste.
Dry Ingredients and Bringing It All Together
Now, let’s prepare our dry ingredients. In a separate medium bowl, whisk together the all-purpose flour, baking soda, and fine salt. Whisking these ingredients helps to distribute the leavening agent (baking soda) and salt evenly throughout the flour, ensuring consistent results in every cookie. It also helps to break up any clumps in the flour.
Gradually add the dry ingredients to the wet ingredients, mixing on low speed until just combined. Be careful not to overmix the dough at this stage. Overmixing can develop the gluten in the flour too much, resulting in tough cookies. You’re looking for a soft, slightly sticky dough that’s a beautiful, vibrant green.
Chilling and Shaping for the Perfect Cookie
Once your dough is beautifully combined, it’s time for a little chill session. This is a really important step! Wrap the dough tightly in plastic wrap and refrigerate it for at least 30 minutes. Chilling the dough makes it much easier to handle and prevents the cookies from spreading too much during baking, helping them hold their shape. While the dough chills, preheat your oven to 350°F (175°C). Also, line your baking sheets with parchment paper. This prevents sticking and makes for easy cleanup.
After the dough has chilled, you can start shaping your Grinch cookies. Scoop rounded tablespoons of dough onto your prepared baking sheets, leaving about 2 inches between each cookie to allow for spreading. For that classic Grinch cookie look, I like to slightly flatten each cookie with the palm of my hand. Then, sprinkle a little extra granulated sugar over the top of each flattened cookie. This adds a delightful sparkle and a touch of extra sweetness.
Baking and Decorating Your Grinchy Creations
Now for the moment of truth – baking! Place your prepared baking sheets into the preheated oven. Bake for 9 to 11 minutes, or until the edges of the cookies are just set and slightly golden. The centers should still look soft. They will continue to cook slightly on the hot baking sheet after you remove them from the oven.
As soon as the cookies come out of the oven, while they are still warm and slightly soft, it’s time for their signature touch. Gently press one red heart sprinkle into the center of each cookie. This is the simplest way to make them instantly recognizable as Grinch cookies and adds that perfect pop of contrasting color. Allow the cookies to cool on the baking sheet for a few minutes before carefully transferring them to a wire rack to cool completely. Patience is key here; warm cookies are delicate and can break easily.
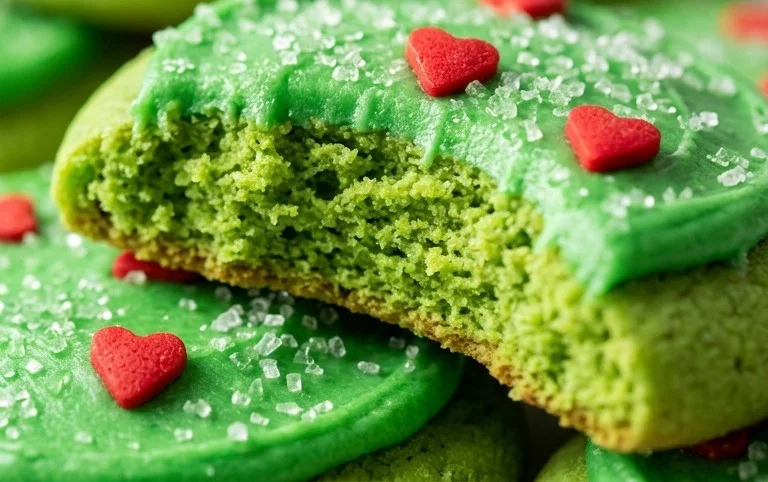
Once completely cooled, your Grinch Sugar Cookies are ready to be devoured! They are wonderfully soft, subtly sweet, and bursting with festive Grinchy spirit. Enjoy sharing them with everyone, even the grumpiest of hearts will be charmed by these delightful treats!
Conclusion:
And there you have it! These Grinch Sugar Cookies are more than just a festive treat; they’re a delightful way to inject a little Whoville magic into your holiday season. Their simple yet satisfying crunch, coupled with that classic sweet sugar cookie flavor, makes them an instant crowd-pleaser for all ages. The vibrant green hue and playful Grinchy decorations are sure to bring smiles and spark conversations at any gathering. They’re perfect for holiday cookie exchanges, classroom parties, or simply as a fun baking project with the family.
Feel free to get creative with your decorating! Beyond the iconic Grinch face, consider adding little hearts for the Grinch’s famously growing heart, or sprinkle them with green and red edible glitter for an extra sparkle. You could also experiment with adding a hint of lime zest to the dough for a subtle citrus twist that complements the sweetness. I truly encourage you to give these Grinch Sugar Cookies a try; they’re guaranteed to become a cherished part of your holiday traditions.
Frequently Asked Questions:
Why are my Grinch Sugar Cookies spreading too much?
Spreading can often be caused by a few things. Ensure your butter isn’t too soft or melted when creaming it with the sugar; it should be softened but still hold its shape. Overmixing the dough after adding the flour can also develop the gluten too much, leading to spread. Chill your dough thoroughly before rolling and cutting, and if your kitchen is warm, consider chilling the cut-out cookies on the baking sheet for an additional 10-15 minutes before baking.
Can I make these Grinch Sugar Cookies ahead of time?
Absolutely! The dough can be made up to 2-3 days in advance and stored, well-wrapped, in the refrigerator. You can also freeze the cut-out cookies before baking for up to a month. Simply place them on a baking sheet in a single layer until frozen, then transfer them to an airtight container. Bake them directly from frozen, adding a few extra minutes to the baking time.
Grinch Sugar Cookies
Festive and fun sugar cookies with a Grinch-inspired green hue, perfect for holiday baking.
Ingredients
-
1 stick (4 ounces/ 8 tablespoons) unsalted butter
-
2/3 cup granulated sugar, plus extra for rolling
-
2 large egg yolks
-
1 teaspoon vanilla extract
-
3-5 drops green food gel coloring
-
1 1/4 cup all-purpose flour
-
1/2 teaspoon baking soda
-
1/4 teaspoon fine salt
-
12 red heart sprinkles
Instructions
-
Step 1
In a large bowl, cream together the softened butter and granulated sugar until light and fluffy. -
Step 2
Beat in the egg yolks one at a time, then stir in the vanilla extract and green food gel coloring until evenly combined. -
Step 3
In a separate bowl, whisk together the all-purpose flour, baking soda, and fine salt. -
Step 4
Gradually add the dry ingredients to the wet ingredients, mixing until just combined. The dough will be slightly stiff. -
Step 5
Preheat your oven to 350°F (175°C). Line baking sheets with parchment paper. -
Step 6
Roll the dough into 1-inch balls and then roll them in extra granulated sugar. Place on the prepared baking sheets, about 2 inches apart. -
Step 7
Bake for 8-10 minutes, or until the edges are lightly golden. Do not overbake. -
Step 8
Immediately after baking, while the cookies are still warm, gently press one red heart sprinkle onto the center of each cookie. -
Step 9
Let the cookies cool on the baking sheets for a few minutes before transferring them to a wire rack to cool completely.
Important Information
Nutrition Facts (Per Serving)
It is important to consider this information as approximate and not to use it as definitive health advice.
Allergy Information
Please check ingredients for potential allergens and consult a health professional if in doubt.