Easy Apple Hand Pies Portable Sweet Comfort
Apple hand pies are pure magic in portable form. There’s something undeniably delightful about biting into a flaky, golden crust that gives way to a warm, sweet, and slightly tart apple filling. We all have those cherished memories tied to comforting desserts, and for many, apple hand pies hold a special place in their hearts. They evoke feelings of home, cozy afternoons, and simple joys. What makes these delightful treats truly special is their perfect balance of textures and flavors – the crisp, buttery pastry against the tender, spiced apples is a culinary symphony. Whether you’re craving a classic fall indulgence or a sweet pick-me-up any time of year, these apple hand pies deliver. They’re wonderfully adaptable, allowing you to play with different spices or even add a touch of caramel. Prepare yourself to create these little pockets of happiness that are sure to become a favorite in your baking repertoire.
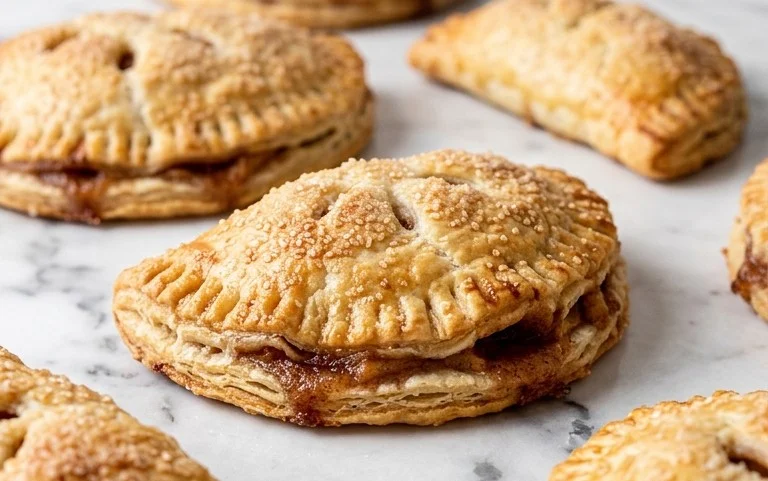
Apple Hand Pies
There’s something undeniably comforting about a warm, sweet apple pie. But sometimes, the thought of rolling out a full-sized pie crust and waiting for it to bake can be a bit daunting. That’s where these delightful apple hand pies come in! They capture all the deliciousness of a classic apple pie in a perfectly portioned, portable package. Whether you’re packing them for a picnic, serving them at a party, or simply craving a sweet treat, these hand pies are sure to be a hit. They’re incredibly easy to make, especially if you opt for store-bought crust, and the warm, spiced apple filling encased in flaky pastry is pure bliss. Plus, the simple glaze adds an extra touch of sweetness and elegance.
Ingredients:
- 1 homemade pie crust recipe, (or 2 boxes of store-bought pie crust dough)
- 2 cups apple pie filling, (or 1 can (21 ounces) store-bought apple pie filling)
- Vegetable oil, (for frying)
- 4 cups (250 g) confectioners’ sugar
- 5-7 tablespoons whole milk, (or more or less until glaze reaches your desired consistency, room temperature)
Making Your Hand Pies
Let’s get started on creating these irresistible apple hand pies. The beauty of this recipe is its adaptability. If you’re short on time, using pre-made pie crust and canned apple pie filling is a fantastic shortcut that still yields delicious results. However, if you have the time and inclination, a homemade crust and filling will elevate these hand pies to a whole new level of amazing.
Preparing the Dough
The first step is to prepare your pie crust. If you’re using store-bought dough, carefully unroll it onto a lightly floured surface. It’s important to work quickly so the dough doesn’t become too warm and sticky. If you’ve made your own pie crust, ensure it’s chilled and ready to be rolled out. Gently roll the dough to about an 1/8-inch thickness. You want it thin enough to be flaky, but not so thin that it tears easily. Using a round cutter, about 4 to 5 inches in diameter (a large biscuit cutter or a small bowl turned upside down works perfectly), cut out as many circles as you can from your rolled-out dough. Gather the scraps, gently re-roll them, and cut out more circles until you’ve used up all the dough. You should aim for roughly 8 to 10 circles, depending on the size of your cutter.
Filling and Sealing the Pies
Now it’s time to add the star of the show: the apple pie filling. Place about 2 to 3 tablespoons of apple pie filling onto one half of each dough circle, leaving a small border around the edge. Be careful not to overfill, as this can make sealing the pies difficult and lead to leaks during frying. It’s also a good idea to drain any excess liquid from the apple pie filling, especially if you’re using canned, to prevent a soggy crust. Once the filling is in place, it’s time to seal. Lightly brush the edges of the dough circles with a little water. This acts like glue to help the pastry stick together. Then, carefully fold the unfilled half of the dough over the filling, creating a half-moon shape. Press the edges firmly together to seal. To ensure a really secure seal and give your hand pies a professional look, you can crimp the edges with a fork. Just press down with the tines of a fork all around the sealed edge. This not only seals them but also creates a lovely decorative pattern. You can also create a few small slits or poke holes in the top of each hand pie with a toothpick or the tip of a knife. This allows steam to escape during frying, preventing the pies from puffing up too much or bursting.
Frying to Golden Perfection
For frying, you’ll need a good amount of vegetable oil in a large, heavy-bottomed pot or Dutch oven. Heat the oil over medium heat until it reaches about 350°F (175°C). You can test the oil’s temperature by dropping a tiny piece of dough into it; it should sizzle and float to the surface immediately. Carefully, using a slotted spoon or tongs, place 2 to 3 hand pies into the hot oil at a time. Don’t overcrowd the pot, as this will lower the oil temperature and result in greasy pies. Fry the hand pies for about 3-4 minutes per side, or until they are a beautiful golden brown and puffed up. Keep an eye on them, as they can cook quite quickly. Use your slotted spoon or tongs to gently flip them over to ensure even browning on both sides. Once they’re perfectly golden, carefully remove them from the oil and place them on a wire rack set over a baking sheet or paper towels to drain any excess oil. This step is crucial for achieving that desirable crispiness.
Whipping Up the Sweet Glaze
While your hand pies are cooling slightly, it’s time to make the simple, sweet glaze that takes them over the top. In a medium bowl, whisk together the confectioners’ sugar and the whole milk. Start with about 5 tablespoons of milk and gradually add more, a tablespoon at a time, until you achieve your desired consistency. You’re looking for a pourable, but not too runny, glaze. If it’s too thick, add a touch more milk. If it’s too thin, add a little more confectioners’ sugar. A slightly thicker glaze will give you more control when drizzling, while a thinner one will spread more easily. You want it smooth and lump-free.
Glazing and Serving
Once your apple hand pies have cooled enough to handle comfortably (but are still warm for the best experience!), it’s time to get drizzling. You can either dip the tops of the hand pies into the glaze, or use a spoon or a piping bag with a small tip to drizzle the glaze over the tops. A drizzle looks particularly elegant and allows the flaky crust to peek through. If you like a lot of glaze, feel free to be generous! Let the glaze set for a few minutes before serving. These apple hand pies are absolutely divine served warm, allowing the cinnamon-spiced apple filling to be gooey and fragrant. They are perfect on their own, but you can also serve them with a scoop of vanilla ice cream or a dollop of whipped cream for an extra decadent treat. Enjoy every bite!
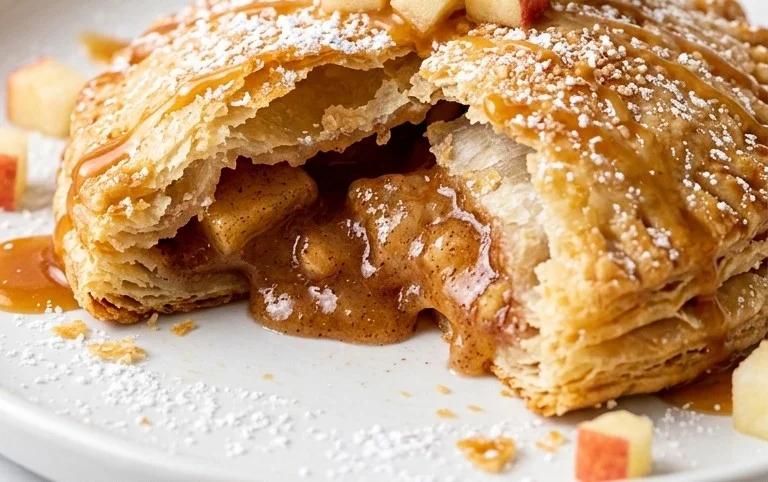
Conclusion:
I truly hope you’ve enjoyed learning how to make these delightful apple hand pies! They are an absolute winner for so many reasons. The perfect balance of flaky, buttery crust and warm, spiced apple filling is simply irresistible. They’re incredibly portable, making them perfect for picnics, packed lunches, or even a quick, satisfying dessert on the go. The best part? They feel special and homemade without being overly complicated. You get that wonderful, comforting taste of apple pie in a convenient, individual portion. I wholeheartedly encourage you to give this apple hand pie recipe a try; you won’t regret the delicious results!
For serving, these hand pies are fantastic warm, perhaps with a drizzle of caramel sauce or a dollop of vanilla ice cream. They’re also surprisingly good at room temperature, making them ideal for make-ahead treats. Don’t be afraid to get creative with variations! Consider adding a pinch of nutmeg or ginger to the apple filling for extra warmth, or swap some of the apples for pears. A sprinkle of cinnamon sugar on top of the crust before baking adds a lovely sweetness and crunch.
Frequently Asked Questions about Apple Hand Pies:
Can I make the dough ahead of time?
Absolutely! You can prepare the pie dough up to two days in advance and store it, well-wrapped, in the refrigerator. You can also freeze the dough for up to a month. Just allow it to thaw in the refrigerator overnight before using.
What kind of apples are best for hand pies?
For the best flavor and texture, I recommend using a mix of apple varieties. A combination of tart apples like Granny Smith and sweeter apples such as Honeycrisp or Fuji will give you a well-rounded, delicious filling.
How should I store leftover apple hand pies?
Store any leftover apple hand pies in an airtight container at room temperature for up to two days, or in the refrigerator for up to four days. For best results when reheating, you can warm them gently in a low oven or a toaster oven.
Apple Hand Pies
Delicious homemade apple hand pies perfect for a sweet treat, with a simple glaze.
Ingredients
-
1 homemade pie crust recipe, or 2 boxes of store-bought pie crust dough
-
2 cups apple pie filling, or 1 can (21 ounces) store-bought apple pie filling
-
vegetable oil, for frying
-
4 cups (250 g) confectioners’ sugar
-
5-7 tablespoons whole milk, or more or less until glaze reaches your desired consistency, room temperature
Instructions
-
Step 1
If using homemade pie crust, prepare according to your recipe. If using store-bought, unroll the dough. -
Step 2
Cut out circles from the pie dough using a round cutter (about 4-5 inches in diameter). You should get about 6 circles per crust sheet. -
Step 3
Spoon about 2-3 tablespoons of apple pie filling onto one half of each dough circle, leaving a small border. -
Step 4
Fold the other half of the dough over the filling and crimp the edges with a fork to seal. Cut a small vent slit in the top of each hand pie. -
Step 5
Heat about 2 inches of vegetable oil in a deep skillet or pot over medium-high heat until it reaches 350°F (175°C). -
Step 6
Carefully place 2-3 hand pies into the hot oil and fry for about 2-3 minutes per side, until golden brown and cooked through. Drain on paper towels. -
Step 7
While the hand pies are cooling slightly, whisk together the confectioners’ sugar and milk in a bowl until smooth and a pourable glaze consistency is achieved. Add more milk a tablespoon at a time if needed. -
Step 8
Dip or drizzle the glaze over the cooled hand pies.
Important Information
Nutrition Facts (Per Serving)
It is important to consider this information as approximate and not to use it as definitive health advice.
Allergy Information
Please check ingredients for potential allergens and consult a health professional if in doubt.